Jamf Parent App
Jamf Parent is a free app that allows you to manage your children's school iPad, from your own mobile device.
You can only add a child’s device to Jamf Parent, or manage your children's devices, with Jamf Parent outside normal school times (7am - 3.30pm Mon-Fri).
Note: Images below are from an Apple device. Options may vary with other devices.
Get Started:
- Install the Jamf Parent App on your mobile device, from your mobile app store.

Google Play Store:
https://play.google.com/store/apps/details?id=com.jamf.parent&hl=en_US&gl=US
Apple App Store:
https://apps.apple.com/us/app/jamf-parent/id1458797105
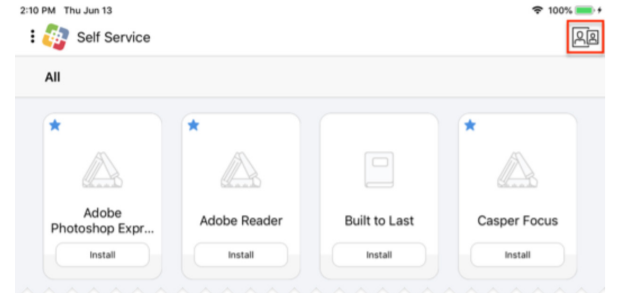
- On your child’s school iPad, tap the Self Service app icon.

- Tap the Jamf Parent icon in the top-right corner. This opens a QR code.
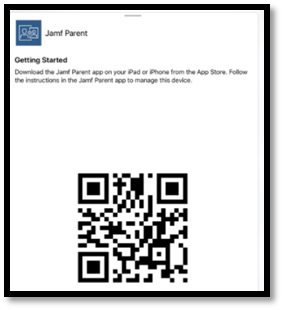
- Open the Jamf Parent app on your own device. Click “Start”, and allow access to Bluetooth and Camera when prompted.
- From the Jamf Parent app, scan the QR code on your child’s device (do not use “sign in” option).
- Repeat steps 2-5 for any additional children.
Allowing and Restricting CATEGORIES of Apps
You can allow and restrict apps on your child's device by category of app.
Example usage:
I don’t want my child to access any games apps.
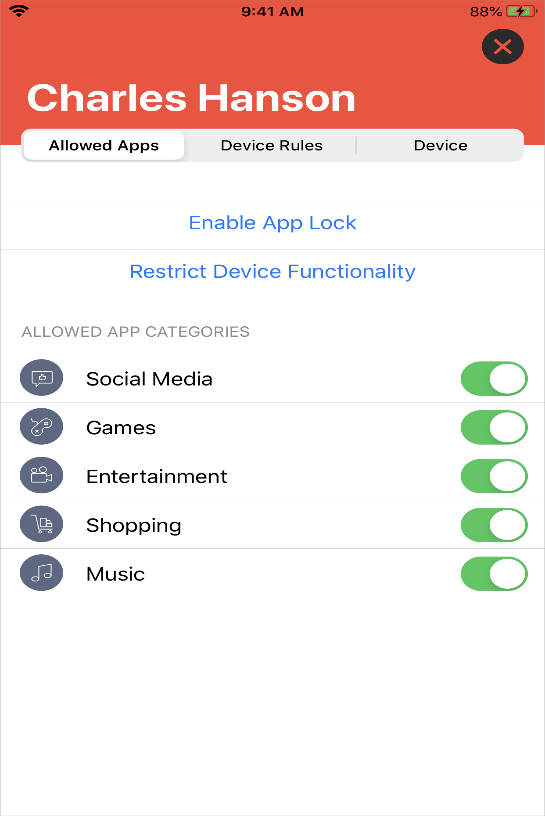
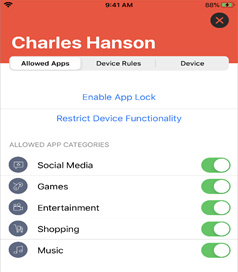
- Select “Allowed Apps” from top menu.
- To disable a category, e.g. games, tap the relevant toggle off (green = allowed; grey = blocked).
- All apps in that category will remain blocked until you re-enable the category (toggle on), or school hours have started.
Notes:
- This feature allows you to block apps – however, please be aware that some sites offer access via an app and also via a website, e.g. Facebook app vs Facebook.com website.
If you want to restrict website access in addition to apps, please jump to the section “Allow access to only SPECIFIC WEBSITES & APPS with TIMER”.
- Not sure what category an app is? Check the “category” description in the mobile app store, e.g. https://apps.apple.com/us/app/facebook/id284882215 categorises Facebook as “Social Networking”.
- Jamf have acknowledged an issue where apps are sometimes miscategorised by the Jamf Parent app. This is being reviewed by their product development team.
Allowing and Restricting inbuilt iPad FEATURES
You can allow and restrict inbuilt iPad features on your child's device.
Example usage:
I don’t want my child to access the inbuilt camera.

- Select “Allowed App Categories” from top menu.
- Select “Restrict Device Functionality”
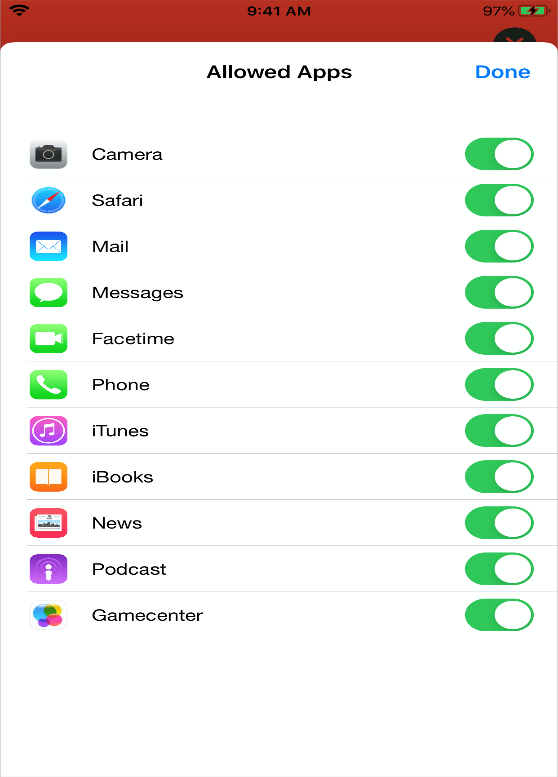
- To disable a feature, e.g. Camera, tap the relevant toggle off
(green = allowed; grey = blocked)
- The feature will remain blocked until you enable it, or school hours have started.
Allowing and restricting APP(S) with TIMER
You can block access to all apps and features, except those you specify.
While your child's device is in App Lock, they will only be able to use the apps you allow during the specified time period.
If you only allow one app, that app launches on your child's device and they cannot exit the app until the App Lock timer expires.
Example usage:
I want my child to have access only to the Word app, for 60 minutes, while writing their essay. All other apps should be blocked for 60 minutes.

- Select “Allowed App Categories” from top menu.
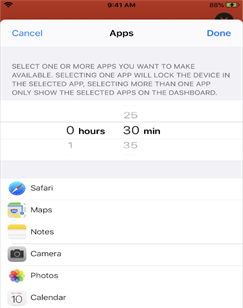
- Select “Enable App Lock”
-
Set the timer, e.g. 60 minutes.
- Select the app or apps you want to enable, e.g. Word. All others are automatically blocked.
- The block will remain in place until the timer ends, you click “disable app lock”, or school hours have started.
Allow access to only SPECIFIC WEBSITES & APPS with TIMER
You can restrict access to only specific websites and specific apps on a timer basis.
Example usage:
I want my child to have time out from digital life. They can access the www.headspace.com/ meditation website from 9pm to 11.30pm every evening. All other websites and apps are blocked.
OR
I want to help my child stay focused during homework time. They can only access Science.com and the Notes app from 4pm to 6pm. All other websites and apps are blocked. After 6pm they can play and access anything they want to.

- Select “Device Rules” from top menu.
- Select “Create Device Rules”
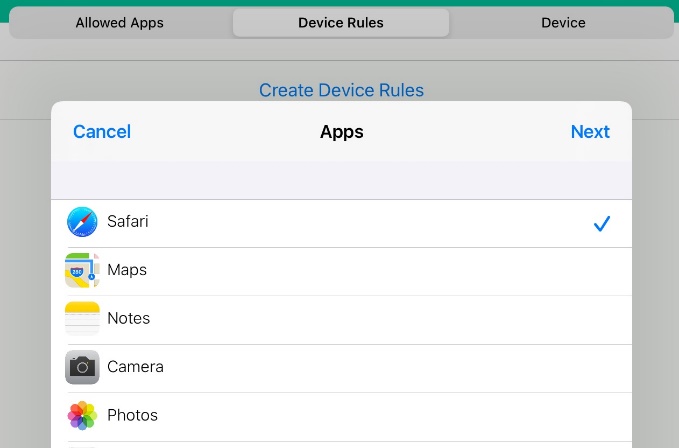
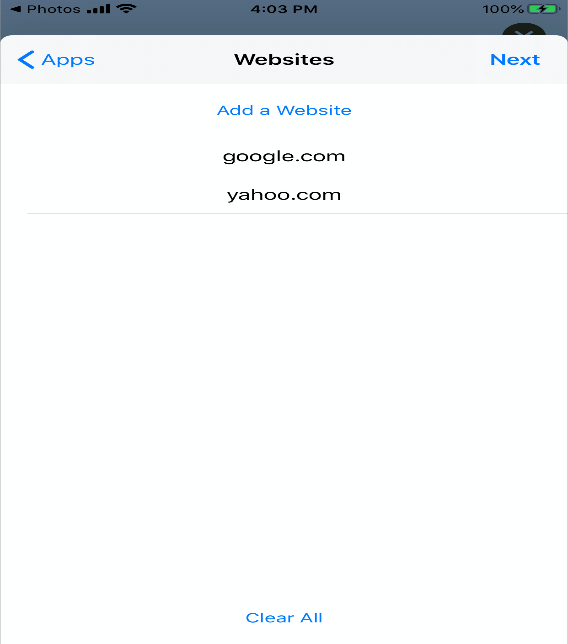
- Select Safari app to start restricting Internet. Click “Next”.
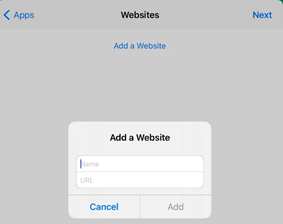
- Select “Add a website” – these become the only allowed websites.
- Give the website a name, e.g. Headspace, in the “Name” box.
- Type the full website address in the “URL” box, e.g. www.headspace.com. This must be accurate.
- Click "Add”. Add more websites as needed.
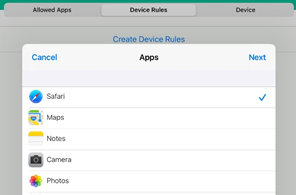
- Internet access is now restricted to Safari, with the specific websites you added. All other apps are blocked.
-
Do you want any other apps to be available?
If no, tap “Next” to go to step 9
If yes, tap “Apps” to return to the previous screen, and select the relevant apps, e.g. Notes. A blue tick will appear beside the allowed apps.
Tap “Next”. Disregard the “add a website” screen – this is only relevant for Safari. Tap “Next” again.
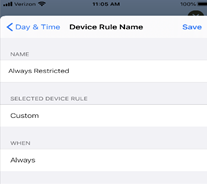
- Give your rule a name and save it.
- The rule will remain in force until
-
- the timer has expired
- you delete the rule (swipe left to delete)
- or school hours have started.
Removing a Child's Device from Jamf Parent
To remove a child's device from Jamf Parent, tap or click the Settings icon in the top-right corner of the screen and tap or click Remove under Account. Tap or click Yes to confirm.

